
Techniques for planning, shooting, editing & PLAYING vertical video
Artists have always made vertical (tall-screen or portrait-format) artworks, so why not films & videos?
In the past many problems derived from how the moving image apparatus was designed.
Now, as digital cameras become more flexible and mobile devices proliferate, the possibilities are beginning to outnumber the limitations.
So, how to make a vertical video? Read on...
Tripods, Cameras & Mounts

Almost every digital camera these days can shoot high definition (HD) vertical video; it's just a matter of turning it 90º and working out how to deal with the ergonomics.
If the camera screen or display can tilt, swivel and still be seen when the device is 90º, great, otherwise turn it the other way (270º) and flip the image in editing if needs be. The smaller the camera, the tougher it is to keep steady while handheld though, so...
How do I mount a camera sideways on a tripod?
Fear not. Here are some ideas.
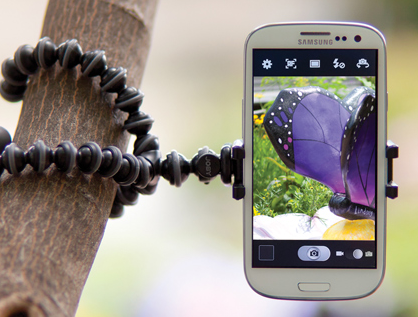
http://joby.com/smartphones/griptight-gorillapod-stand
Plenty of manufacturers make mounts for mobile phone-cameras (above).
Many adventure/sports cameras come with simple 3-way pivot arms which allow you to angle them sideways.
Most ball-head tripods (above) allow 90º tilt shots.
If you have a DSLR camera, you might use a 3-way tilt-head tripod, usually reserved for stills, and mount it on that. This enables rough tilt & pan as well.
If your tripod legs have a horizontal centre column option, that's also an alternative, though somewhat cumbersome.
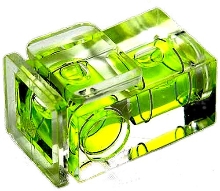
In each case, you might want to keep shots angled correctly by investing in a small spirit-level that slots into the hot shoe connector on your camera to show when it's level.
None of these solutions is likely to give you smooth pans or tilts however. That may or may not be a problem depending on what you want to do.
For smooth tripod moves, or for cameras much heavier than a kilogram, you should be using a more solid tripod, ideally with a fluid head for gentle moves on both pan- & tilt-shots.
Therefore you might need an (also called an L-Plate) to go on top of your tripod's baseplate.
(continued from left column)
You can buy them in what’s called “Arca-Swiss standard” if you have an Arca-Swiss compatible tripod; or as one that sits atop your standard tripod baseplate. Or make your own with an L-bracket and buy the right screw for your camera from a hardware shop. Make sure your camera doesn't pivot on the screw and tip down under the weight of its lens though. Larger cameras may have a second hole in their baseplate for a “registration pin” which prevents this.
If you're lucky enough to have access to a gimbal stabiliser such as a Movi or Letus Helix (above), you may be able to use the joystick control simply to rotate the camera 90º. A small number of drones such as the original DJI Mavic Pro have "portrait" modes which tilt the gimbal 90º for 4K vertical.
Above, the easiest solution for traditional fluid head tripods: try rotating the baseplate 90º on the bottom of your camera, mount it back on the tripod, tilt the head forward 90º and you have a workable solution on one axis without extra equipment. Make sure you counter-balance its tendency to fall, base-over-apex, so to speak: make sure one of the tripod legs is always directly below the camera.
All too complicated?
Go handheld.
Handheld camerawork is becoming more and more common in cinema as an aesthetic choice. But beware that the narrower field of view of a 9:16 frame tends to exaggerate horizontal (left-right) movement, especially when projected large and tall, as in our Festival. Excessive camera wobbles — or even medium-fast pans — will amplify this effect and may make your audience ill! Image stabilisation may help if you have a lens with this feature, and applying an image stabiliser filter in editing may sometimes fix small wobbles — but do some tests of both with your camera and know the (sometimes severe) limitations of both methods. You can reduce the nauseating effects of constant movement by following some .
Left of Field options…
Could this be the ultimate low budget vertical filmmaking rig: kebab skewers and tape!?!
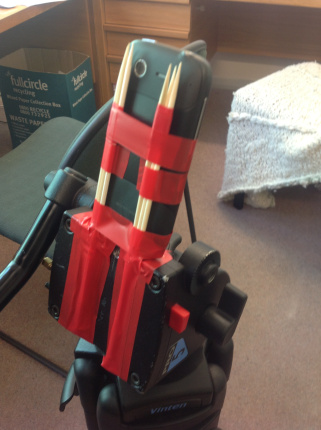
From http://www.exit109.com/~dnn/verticalmedia/Text/
ⓘ A word of caution: always take care when mounting cameras in ways that the manufacturers didn't intend, as their centre of gravity will shift, potentially making them unbalanced, and perhaps placing unexpected strains on the mounting point.
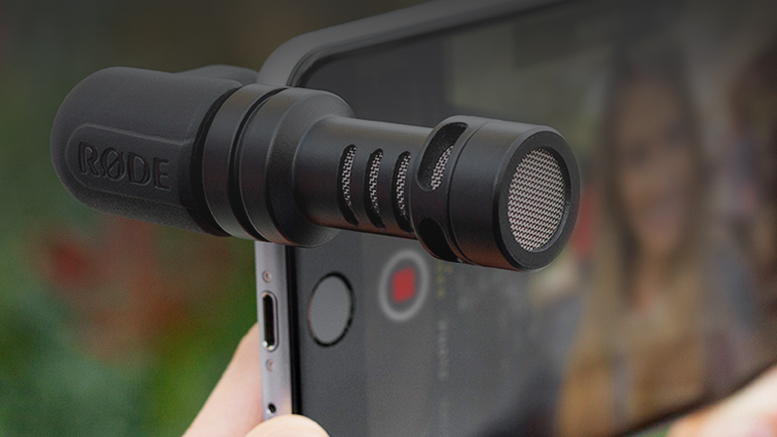
ⓘ Some smartphones produce very good images these days but if you decide to make your film with one your big problem may be sound. If location sound is important you might use a separate audio recorder such as this and synchronise it to the image in editing; or at the very least get a microphone that plugs into a phone such as this:
Shot Composition

Vertical video framing initially takes a bit of thought; obviously not every subject is suited to this format. Humans, yes ... but only till they start to move quickly: thanks to gravity most action usually takes place horizontally, and horizontal movement is not vertical's strong suit! Pans or rapid action moving across the frame can be discombobulating for audiences due to a reduced field of view.
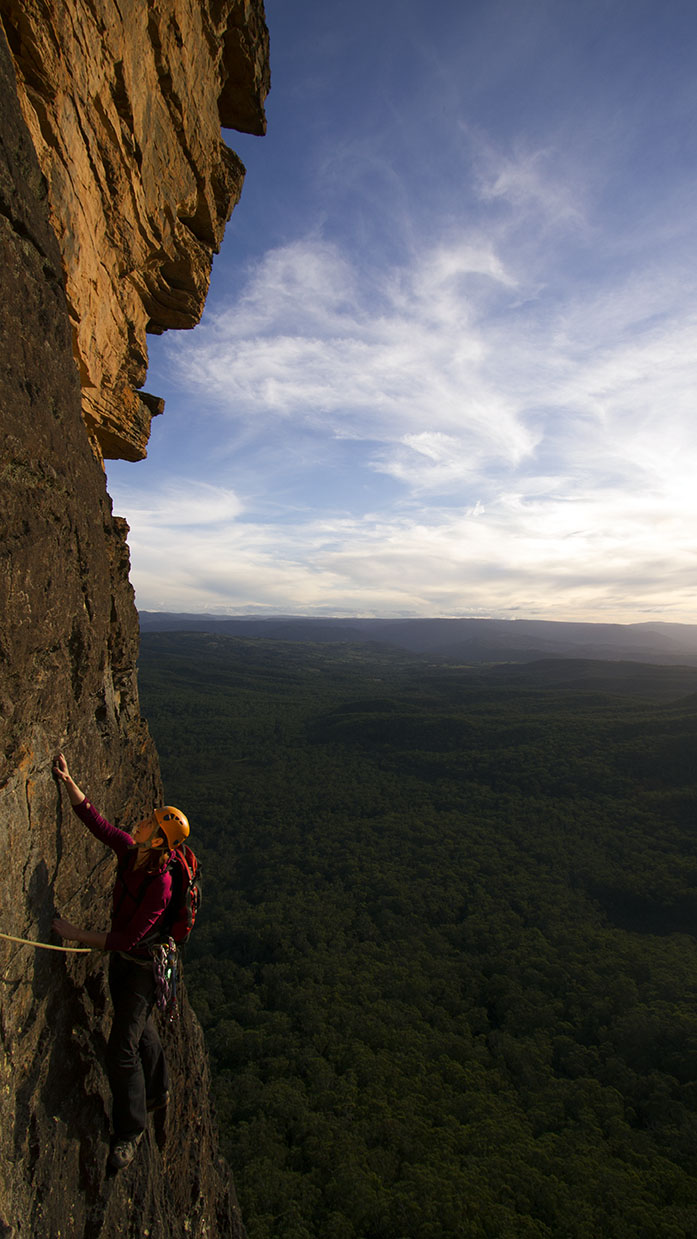
On the other hand, low and tall angles take on renewed power in the vertical format.
Look out for strong vertical features in the composition of the shot that can give reason for it to exist in the vertical format. People (standing or seated), buildings, trees, mountains, giraffes... ;-)
The Rule of Thirds still applies. If your shot has a strong horizon, consider moving it above or below the middle of the frame — unless 50/50 sky/land is your compositional strategy of course!
Remember that action-safe and title-safe areas also apply: keep important detail and especially text away from frame edges, especially top and bottom, lest it be cut off during stabilisation, projection or playback. Some screen devices like iPads (with a 3:4 aspect ratio) may crop top and bottom when expanding the image to occupy the full-screen, while Instagram crops 4:5.
ON CROPPING VS ROTATION
If you can shoot 4K video but only need 2K or less (eg. HD) you might be tempted to mark out a 9:16 frame within your camera's horizontal LCD display, and then crop it in post-production. Don’t be tempted! Shooting full-frame vertical forces you to think about and compose the tall-screen framing natively; it removes a layer of post-processing & rendering; makes your image sharper, potentially avoids lens distortion and future-proofs the material for 4K vertical usage.
At the Festival we strongly discourage centre-cropping — and discerning viewers can usually spot its use!
Subject Matter

Our first Festival was an umbrella event of the Australian Climbing Festival and so quite a few entries were climbing- and mountain-related.
However there are plenty of other subjects out there that would benefit from a vertical perspective as well, particularly those involving people. The best advice might be to choose a subject — any subject — which 9:16 can explore from a whole new perspective.
Have a look at the films from our 2014, 2016 and 2018 Festivals for inspiration!
Editing

Exact workflow here will depend on your editing program. The basic principle is to edit your footage how it was shot, ie. with it filling the screen (“canvas”). Whatever you do, don't create an editing canvas with black side-bars as you're losing resolution and making problems for yourself later.
Either:
1A. Work with the footage on its side (the easiest and most common method, especially for projection — but it involves an additional later step, step 3. below, for web viewing). Import and edit your footage as it is, at its highest resolution. For playback you might like to use a second display and turn it on its side to avoid neck pain! Tablets can be used as secondary vertical displays for a computer.
Or...
1B. Create a vertical project and edit with clips already vertical. Many professional editing programs such as FinalCutPro X now cope with custom project sizes. In this case manually enter a 9:16 aspect ratio when creating a new project (eg. 1080x1920 or 720x1280 pixels) Adjust your clips' rotation if needed.
'New Project' settings in FinalCutProX
Finished Editing?
2. Now export the video, keeping your project dimensions and frame rate the same, and the video & audio quality high (ie. with minimal compression). Aim for as close as possible to a 500MB file size as this is the upload limit for a free Vimeo account. If you’re exporting greater-than-HD resolution, you’ll need to export in the H.265 codec to keep it small enough.
3. Only IF you've been editing sideways (method 1A) and you want to exhibit your work online you now need to take an extra step. Use the free, cross-platform MPEG Streamclip (see screenshot, right) to rotate the video 90º and re-save it (use SAVE AS, not 'export', else you will lose some video quality on the re-encode). This procedure may also work with Quicktime for Mac or ffmpeg for Mac and PC if you already have those programs. All you're doing is changing the tiny 'rotation flag' on the video file — without re-encoding it — to tell playback programs which way is up. (Quicktime, Vimeo & YouTube respect this flag, but some versions of VLC may not.)
4. Now you have an edited vertical video exported as such. At this stage you can upload it to the web. Details about our upload and submission procedures are on our Submit Your Work page (you should read this next if you're submitting a film to us).
ⓘ If you shoot on an smartphone or tablet, your footage may already appear rotated in your editing program as many devices automatically set the rotation flag to Portrait or Landscape based on an internal gyroscope, during shooting. The project and clip dimensions should show a smaller figure before a larger figure, eg. 1080x1920 or 2160x3840. This first number is always the horizontal width, in pixels. It is also the first number in the aspect ratio, eg. 9:16.
ⓘ Don't want to buy an editing program? Consider the free DaVinci Resolve for Mac, Windows or Linux.
Above: Rotate your completed vertical video with the free MPEG Streamclip. Once rotated, SAVE AS (not EXPORT) to avoid recompression and consequent quality loss.
PROJECTORS & DISPLAYS
These directions have described export for viewing via the web.
If however your destination is a projector or other screen tilted on its side, you should use the method described in sections 1A & 2 to export a sideways screening copy. (Check whether the projector/screen will be rotated left or right though, otherwise the audience may need to stand on their heads to view your film! If in doubt keep the top of the image on the left.) Our Festival accepts both rotated and non-rotated submissions.
MUSIC

If you use existing, published music you will need permission in writing (a licence agreement) to do so. These can be very expensive unless you know the writers and performers personally!
Here's a link to a brief explanation of music copyright for filmmakers.
You can buy tracks for video use from a site like AudioNetwork or Vimeo's own , or you might dive into the sharing world via Creative Commons (CC). Here's an explanation of how CC works, with site links, and here's another listing of Creative Commons music sites such as SoundCloud. You can audition soundtracks on MobyGratis. Or, better still, befriend a composer or some musicians who want to get their music out to the world!
Working Vertically Online

2015 marked the first dedicated vertical video app for mobile devices called Vervid. This was a short-lived development. Today it has many successors.
We use for judging previews and for exhibition of finalists because they're one of the few sites that allow us to easily embed tall-format screen videos up the right way on the web without encountering the vertical filmmaker's nemesis: pillar-boxing (black bars on the sides of the video). Bizarrely, pillar-boxing may appear on your video when viewed on Vimeo's own page, and your icon may appear squished, but both problems disappear if you 1) embed the video on your own page or blog or social media channel and 2) upload a custom thumbnail via Vimeo's settings for the video. Free Vimeo accounts have a 500MB limit so deliver in H265 codec. They have finally removed their patronising warnings about your video being shot the wrong way!
Facebook centre-crops the top & bottom of vertical videos in some situations, though a savvy viewer on a mobile device can double tap the video to view it in full 9:16. IGTV is designed for vertical video, but Instagram’s normal feed crops vertical videos to 4:5 so be very careful when placing titles. We haven’t tried SnapChat or Periscope yet.
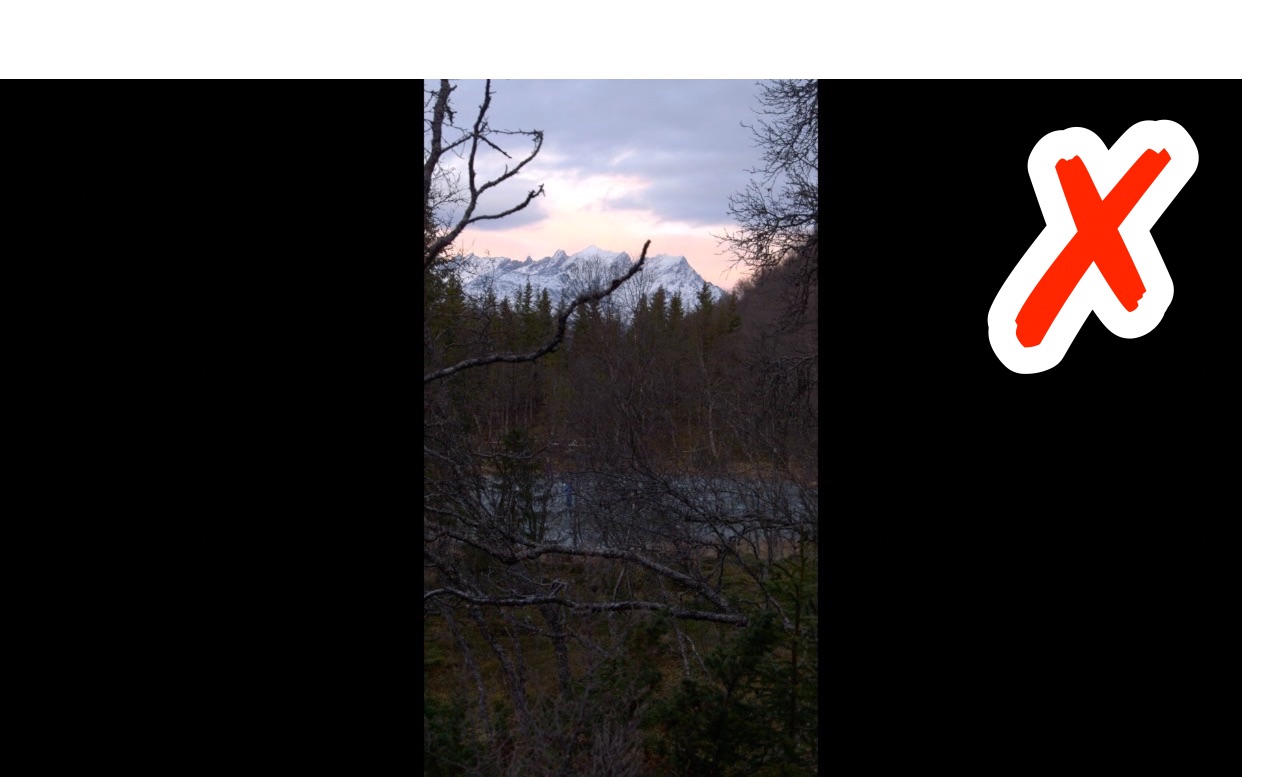
As of May 2020 YouTube (above) unforgivably displays vertical videos with pillar-boxing if you embed the video directly on a page. The solution here (at the time of writing) would be to manually edit the embed code before pasting it into a webpage, changing dimensions to a 9:16 ratio, eg. 1080x1920.
Vimeo (see an example we shot in Iceland, above) is still the best option for maintaining the filmmaker's aesthetic intentions across platforms, and allows embedding without any black bars.
Hopefully these companies will soon realise that vertical videos can be a valid aesthetic choice on the part of the filmmaker, and that they therefore deserve a bit of dignity! :-)
One organisation that has really thought about developing vertical video across multiple formats is the Norwegian NRK:

PROJECTION

If you're using a video projector many will come with specific warnings against turning them on their side.
It's not a conspiracy against vertical filmmakers, just lack of design forethought: hot air rises and needs to be able to escape through a vent.
If you play back with the projector horizontal however, you will have the image confined to a low-resolution centre area with black side-bars. So it's best to find a projector that can cope with vertical mounting.
We don't recommend using projector models that specifically caution against it —
Projector set-up at the 2nd VFF.
but if (like us!) you do anyway, at least take these few steps:
1) Work out how the heat generated by the lamp will try to escape when mounted on its side and ensure that it can, else you'll blow a very expensive bulb and may melt internal components or cause a fire.
2) Stabilise the projector vertically (we use a large stand and then tie-down lashing straps designed for for load restraint) while keeping the input ports accessible behind or on top. Unless you projector has horizontal keystone adjustment (most don’t) the lens needs to be the same height as the screen centre to avoid distortion.
3) In a hot environment you may want to point a fan at the unit.
4) Have all of your films ready to go as a on a laptop with a solid state drive. Treat the projector as a second monitor, go to full screen playback on that screen, turn off OSD (on-screen display) in VLC preferences, turn off any notifications such as calendar or mail pop-ups and sounds, hook up the audio, and you're ready to go!
Final Thoughts...

All these tips have been about vertical vision, but that's not to say good sound is any less important ("sound is fifty percent of the movie-going experience" according to a certain well-known Hollywood director). Recording good, clean sound on location may save you hours of anguish in the editing room and your audience will thank you for not having to listen to lens stabilisers clicking away.
And no, you probably shouldn't rotate your stereo microphones 90º with the camera, otherwise left/right will become top/bottom while your playback speakers probably won't be! Maybe Dolby will come out with 10.1 surround one day (woofer + 5 channels down low, and another 5 near the ceiling?) but until then "vertical sound" must wait in the wings...
Hopefully by now you're tempted to give vertical video a try if you haven't already. Your choice of whether to make a horizontal, vertical, circular or even a square film (like Xavier Dolan’s Mommy) would, in an ideal world, be determined by your subject matter and what you’re trying to say. Ignore the naysayers who will whine that "our eyes horizontal!" Imagine if Leonardo da Vinci had listened to that argument before painting the Mona Lisa. Perhaps cinema is at its most powerful not when it’s creating widescreen illusionism but rather offering alternative visions of our world.
Lastly, like the early pioneers of expanded cinema, don't be afraid to test out new ideas, make mistakes, find solutions, break rules, and push the vertical form's potential. That's precisely what we set up the Festival to do: to encourage artist-filmmakers to experiment. We can't wait to see what you come up with!
Adam Sébire
Festival Co-Director